Saturday, November 7, 2015

The Projects Just Keep Coming - 2015


We're already in November?  Where does the time go?  We're all so busy that the time just flies by.  There's no room for boredom at my camp.  How about you?

From the time I last posted it has been non-stop, and I could easily fill my post with a multitude pictures of the things I've accomplished but that would be too much and, frankly, quite boring.

However, I will share some of my projects.  Some are for work and some are for play . . .


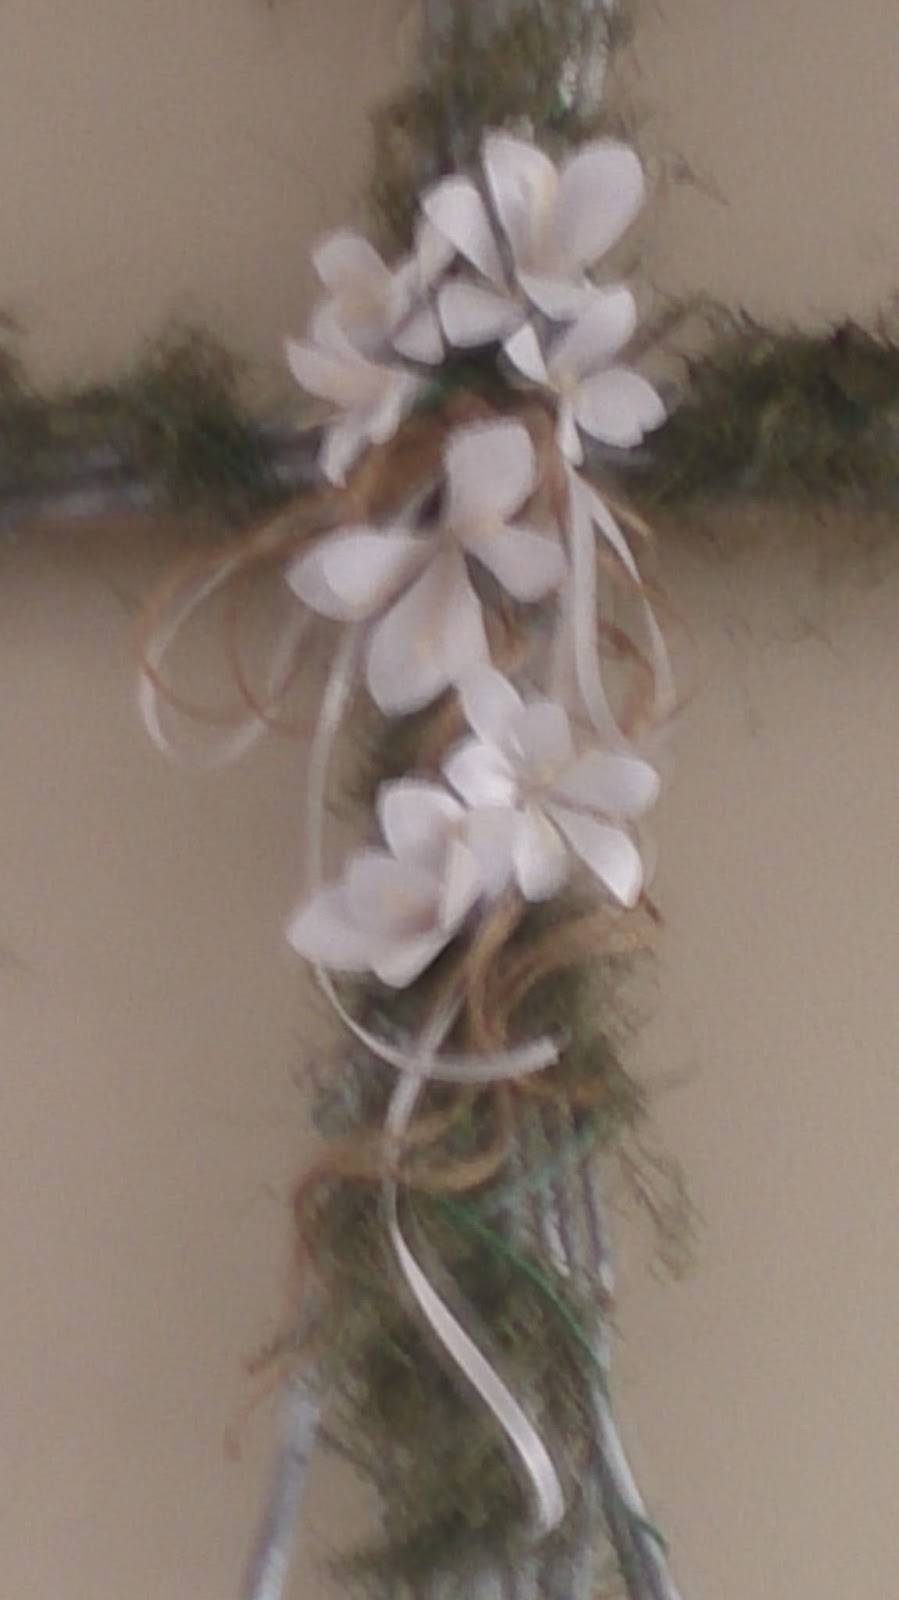
Easter floral cross I made for the senior center.  I made the paper flowers and gathered sticks from my yard.


St. Patrick's Day Popcorn bar I made at the senior center - inspired from Pinterest.


e
Backdrop made by my co-worker Dustin Roberts and furniture by me for puppet show we performed on Cinco De Mayo.


Father's Day - Cupcake bar.  I made the cupcakes, wrappers, and display.


Set up mini chalk boards on a wall in my office to keep track of volunteers and nursing students I schedule at work.

One of the games for Halloween - wrapped each toilet tissue roll in tissue for pumpkin effect. 

My design for Halloween 30 centerpieces at the senior center.


A guessing game for the party at work.  I also made the table runner.
 

Prepared for grandson's Halloween at my house too.


We also helped the seniors support the Royals with a little face painting courtesy of Dustin.  He's a great artist and fun to collaborate with.


There's so many things I didn't share but then I would be writing a book.   I have also made an autumn quilt top, but I don't want to post it until I decide if I am going to keep it or put it in a Thanksgiving raffle at work. If I raffle it, I will post it just before the winner is announced.  Until then, be safe and enjoy your projects. 


Thursday, December 25, 2014

Crafting in Every Direction

Merry Christmas Everyone!

Since the last time I've posted, I have had the opportunity to accomplish a lot of fun things.  Many of which will not be posted as this would be way too much.  As I may have mentioned though, this January (2014) I launched a quilting program at the Senior Center.  Even though I started out with seven enthusiastic quilters, six stayed the course and others came and went over the course of the year.  My classes are offered four times a month, about once a week.  The majority of the quilters were dead set on quilting their quilts by hand but after members of the Kansas City Modern Quilt Guild presented their lovely quilts and I had shown them the quilts I had made by machine, they were sold on learning this new technique, at least new to them.  Their first assignment was a table topper.  Here's the one I used as an example:


 and here's one that one of the seniors finished.


This student completed hers in early summer and is currently working on a baby quilt for an expecting relative.  I could go on an on but I won't .

I also squeezed in time to make a modern quilt for exhibit with the Kansas City Modern Quilt Guild at the Kansas City Star.   This is it - I named it Chexies over Hexies.


Aside from quilting classes and quilting and teaching sewing lessons at home, I am lucky enough to have a job that allows use of creativity in the arts and crafts realm, so I get to cover a lot of areas, and I plan a multitude of parties throughout the year as well.  I design and hand make centerpieces (30 for each party), make and purchase decorations, plan games, and assist with planning the refreshments.  Just recently, we had two Christmas parties:  The first was for the seniors' grandchildren and the second one was for the seniors only.  This is the centerpiece I made for the seniors only party.  The challenge, however, is working with a very limited budget but I make it happen . . . usually $30 or so and the use of many coupons to make this happen.  Crazy I know!


I also put up for raffle a lap-size rag quilt that I personally made this fall. (I actually made two but I'm keeping one of them.)  It was included as part of the activities at the Christmas party.   All the money earned is going to arts and crafts supplies at the senior center.  Here it is:


The new owner of the quilt was very excited, but watching her walk away with it made me sort of melancholy.  I got over it though.

My newest project is Art Journaling with the seniors.  This is a blast and I will have to post some of their creations at a later date.  Until then, enjoy the rest of the evening and Happy New Year!


Tuesday, December 31, 2013

Trying My Stockings On for Size

It's been such a long while since I last posted, and I've missed connecting with everyone.  For me, the last quarter of this year seems to have put me into overdrive.  My new job is very fulfilling but it has taken me away from my sewing machine way more than I ever anticipated.  You see, in mid-August, I accepted a position as an activity coordinator at a senior center and thought that this would allow me to carry on as usual--teaching sewing and making quilts, etc.  But boy did I underestimate the personal time my new job demands--particularly during the holidays--from Halloween all the way through the end of the year.  Yeah, I'm close to the finish line!  For those who know me, know that I take pride in completing projects that I start but for the first time in a very, very long time I have quite a few uncompleted projects sitting in my studio.  All my creative energy has been redirected to the senior center.  I have been doing a lot of prep-work for crafts, organizing parties and activities, and decorating for one event after another, involving putting in a lot of extra hours.  While all of it is a lot of fun, I am also seeing that I am accomplishing very little at home.  I am truly looking forward to the new year, as it will bring about a slower pace so that I can focus again on my own projects.  Since I last posted, all I have been doing in my studio is teaching so anything that has been made, has been made by my students.  After Christmas, however, I was determined to squeeze in a small project and finish it!  I made Christmas stockings for my husband and me.  I made modified (functional) versions of the quilted stocking from the book, Pretty in Patchwork Holidays . . . 2012 by John Q Adams, incorporating the color scheme in my living room and used the scraps I had on hand, so here they are:


So even though Christmas is over, I'm trying my stockings on for size. They look great and since my husband and I have decided that for now on we'll just exchange gifts that will go into our stockings, they're just the right size for us--slightly over sized, and we will no longer need to wrap our gifts.  Another step toward living simply but still a long road to get there.  Good night!


Saturday, September 14, 2013

Back from Fabric Fest

Wow!  What a great time my girlfriend, Sharon, and I had in Las Vegas!  We came back with lots of loot (sorry no winnings from gambling), met lots of people, made new friends, learned new techniques, and bought a lot of fabric!  We were not disappointed.

Here's the free stuff we got for attending.


Some of the items above are fabric, thread, a Make and Take kit, 2 magazines, 1 sewing book of projects, card stock for scrapbooking, buttons, scissors, binding clips, etc., etc.

Riley Blake put on an outstanding conference.  It was truly an honor to be taught and lectured by some of the most respected quilters, sewists, and crafters in the industry.  Jenny Doan from Missouri Star Quilt Company and known for her on-line tutorials, Eleanor Burns, and Nancy Zieman, who are known for their long-running TV shows and authors of numerous books were among those who lectured and taught.  It was a blast!

All the attendees were treated like royalty and people came from as far as Australia and as close as Las Vegas of course.  It was Riley Blake's first conference and it was so nice to meet the Riley Blake family and be their guests so to speak.  The detail and planning put into this conference was amazing.  The meals provided were like no other conference we've attended, offering a wide variety to meet everyone's dietary needs yet prepared exceptionally no matter what was served.  We even were served the wine of our choice at the night of the dinner and fashion show.  Oh, and the fashion show was a combination of garments and quilts all made from their new lines.  The fashions had a modern retro feel and the quilts shown were both modern and traditional--truly offering something for all tastes in fabric and design.

As for what I learned (but already knew), chevrons are in!  Chevrons can be displayed as big and bold or teeny-tiny.  Colors are vibrant yet soft.  Prints are fun and playful.  Solids are also vibrant yet soft.  Everything there was fresh and cheery.

On the technical side, I attended a workshop on lining garments and we made a little girl's reversible dress.

I also sat in on Nancy Zieman's sewing tips workshop and learned an invisible method for putting elastic in a waistband and easy tips for making a laptop case and a tote bag.

I also did "piecing" with Eleanor Burns in her "Hole in the Wall" workshop.  The pattern was, again, modern-retro with use of Riley Blake fabrics.

Additionally, I sat in on how to use social media to your advantage for blogs via Pinterest, Facebook, Instagram, and Twitter, and attended a workshop on finding your signature style.

There was also time for shopping and we shopped so much I felt the need to have my bag weighed before going to the airport.  Can you believe my bag weighed between 41-42 lbs. (including my clothes)?!  Okay, I had fun but I'm happy to report that I didn't go overboard.  Whew!!!!

Before I go, I do want to share a photo of the reversible dress I made, which was the only project I  completed while there.  The other projects will be finished sooner than later I hope.  Here it is:


Sorry about the angle of the dress in these photos.  Anyway, this is a size 4 dress but the kit we received makes up to size 10.  The pattern is from Cottage Momma - designer Lindsay Wilkes.  Her pattern comes with three views but she selected this simple design for the class.

I'm so happy I went but am happy to be home.  I have to go now.  Happy sewing! 


Sunday, September 8, 2013

Fabric Fest Here I Come!

Oh yeah!  I can't wait to hop the plane and cruise the clouds!  A friend and I are headed for an adventure, a sewist's dream--yes--Fabric Fest!  This is a first annual event where sewists, quilters, crafters, and bloggers will meet to learn and share and, of course, play with fabric.  There will be a good mix of traditional and modern presenters there, which means variety as well as fresh ideas.  What more could anyone who loves fabric ask for?  Well, I do have to admit, m-a-a-a-y-be finding time to play the slots or something of that nature is a must as well.  Even though gambling is adventurous, it really doesn't compete (for me) when it comes to sewing and crafting, and I'm sure my girlfriend will agree.  Right Sharon?

Anyway, on a more serious note, while attending Fabric Fest, attendees have been asked to donate to the Conkerr Cancer charity--a charity supporting families of children with cancer.  Each year their objective is make and donate a specified number of pillowcases to children with cancer, to help bring some comfort and happiness to them.  Participants at Fabric Fest can either bring a homemade pillowcase or make one while there.  My pillowcase is ready and packed.  Here it is just before putting it into the suitcase:


I went gender neutral with primary colors.  Although it was hard to resist making up a pillowcase from all the girlie fabric I have.  Hopefully a boy or girl will enjoy having this on his or her comfy pillow.

Also while at Fabric Fest, I will be taking a workshop on lining garments.  Sounds serious but I'm all about honing my skills and keeping up with techniques to teach.  On the lighter side of things, we'll be making and lining a little girls dress so for me that will be fun and delightful.

Okay - I'm headed west - will check in upon my return.

Chow!


Monday, August 12, 2013

What About A Casserole Carrier!?!?

Okay, so you've seen the t-shirt quilt, but what I didn't show you yesterday was the shower gift from ME.  Before I show you, I must tell you that I really, really enjoy giving gifts.  For me, it starts with coming up with an idea or theme; then it's shopping for or making the item or items so the gift becomes tangible; then it's about seeing the recipient's reaction when they open it.  I just get a real thrill from it all.  When you really think about it, some of the best highlights of life are surprises - so I guess it's all about the surprise and the quest to make it happen.

I'm also known for giving cookbooks as gifts, which, by the way, is no surprise to my friends and family anymore. LOL.  Well we have to be known for something?  So I started with my usual search on the Internet and found an awesome cookbook entitled, What Can I Bring?  by Anne Byrn, which I reserved for pick-up at my local bookseller.  This book was rated pretty highly and thought it would be perfect for a young couple that entertains and socializes quite a bit.  I also thought to encourage them to use the cookbook, they would need something to carry their dish(es) in, so I did a search on casserole carriers and found the blog TAYLORMADE at http://www.itstaylormade.com/2011/10/casserole-carrier.html, which ultimately took me to the tutorial:  2 Little Hooligans at http://www.2littlehooligans.com/2010/10/24/casserole-carrier-tutorial/.  I then made my casserole carrier incorporating features from both of theirs.  Here it is:


And of course I picked up a casserole dish to put inside.  So my themed gift for potluck became a real gift--not just something I had in mind.   By the way, the gift-ee loved it! 

Sunday, August 11, 2013

T-Shirt Quilt Reveal

Today was my friend's daughter's bridal shower.  And if you are a hopeless romantic like me, you'll agree there's nothing like getting together with family and friends on a special occasion like this--second best only to weddings.  (Yes I'm sappy.)  I do have to admit that it has been a little while since I've last attended one--a bridal shower that is.  This one was especially significant to me, aside from being a part of honoring the bride-to-be, who I watched grow up with my own kids, I had contributed indirectly to her "big" gift that was going to be from her mother and father and I couldn't wait to see her reaction.  You may remember a few weeks ago, I mentioned I was making a quilt for a customer and that I would be showing it to you when it was done.  Well I was finished with it several days ago but decided not to post it until now because of the off chance my friend's (also customer) daughter, Danielle, might visit my blog and see it before she was to receive it, and that would have been a bummer.   Here is a picture of it immediately after I finished it.


Anyway, back to the shower . . .  the package with her quilt in it was to be opened last, so Danielle's mother and I were patient yet anxious to see her reaction.  Talk about waiting for "the reveal!"  Ahhh, the moment finally came, and, of course, there were tears of joy and Danielle was deeply touched.  She was so surprised to find out that her mother had saved all of her t-shirts since the age of four participating in various sports all the way through her college years, AND to also have them made into a quilt brought on the waterworks!   Being there and knowing that this will be a quilt she'll cherish for the rest of her life was really pretty cool.  I was so happy to be able to witness that moment.  I took pictures!


Mother and Daughter


Great job mom (Rhonda)!  Rhonda and Ben, you two are awesome parents!


Monday, July 15, 2013

Living Like A Vampire

It's been a good long while since I've posted.  And, yes, I'm up at 2:45 a.m. writing, and not necessarily because it's when I do my best writing.  My explanation is simply that I have been working nights around the corner from my home for the past three months, and I have been trying to adjust to sleeping during the day and being up all night, even on my days off.  While this would seem to be a perfect scenario on weekends for a person who likes to sew at night while it's quiet and no interruptions, the problem I am encountering is that I find myself having to recuperate after a full week of very physical work. So to avoid sewing mistakes, I have been avoiding sewing when extremely tired.  I believe I now know what it's like to be vampire.  You see, while the majority of the population is up and about during daylight hours, I'm sleeping (or trying to) in my dark bedroom--blinds closed--preparing myself for another eight hours of lifting and carrying heavy boxes and standing on my feet.  Additionally, to sustain an adequate energy level, I've taken to drinking low fat fruit smoothies (Oh, blood that is. LOL), taking vitamins, and eating as nutritiously as possible, which is a good thing.  However, I still have to play mental games with myself to continue with this crazy idea of mine.  At the time I decided to do this, I thought that this job would be perfect because I would be more physically active and would still be able to teach sewing without changing my students' schedules, and quilt for customers and myself.  In other words, I would be able to continue to do what I enjoy--among other reasons.  Well reality is that this is only slightly true.  I still teach sewing but have had to change schedules here and there, and I am currently making a quilt for a customer--yeah!  I do have to admit, however, that my energy level is not the same and I haven't been sewing for myself.  I also find that during the evening hours, it's all about squeezing in laundry, cooking dinner, and resting before going to work.  I am living like a vampire!  A vampire who sews, cooks and cleans, and works nights.  What was I thinking?  I have always had a great amount of respect for all the healthcare professionals and other working professionals that work through the night--those that ultimately make life easier for the rest of the population during the day--but my respect has been taken to a higher level. To the vampires who started their careers working nights and have been doing it all or most of their working careers--you truly have "eternal life" in my book.  I'm not so sure I will.  Oh well, the sun will be rising shortly, so it's time to start thinking about sleep.

I'll be posting the quilt I'm working on in a couple of weeks but hopefully I'll be back to chat sooner than that!  Good night, or day?!?!


Sunday, May 19, 2013

The Panda Gift

As I mentioned in my previous post, I have a checklist of projects to do.  So far I've hemmed my daughter's sheers for her bedroom window (check) and have just finished my grandson's teacher's gift (check).  Even though the sheers needed to be altered, I didn't bother taking pictures because, really, it was a pretty mundane task and not worth photos.  However, the gift I made for my grandson to give to his teacher is quite different.  Before I share pictures with you, I'd like to first share the reasons for making it.

This was my grandson's kindergarten teacher's first year teaching at the school my grandson attends.  Upon entering her classroom, you will find many wonderful visuals and aides that promote learning of course.  The theme throughout her room is that of the Panda bear and the environment in which it lives--done in a happy child-like style.  One day, after volunteering to work along side her in her classroom, I inquired about her classroom theme because it was so delightful.  She told me that previously she had a cowboy theme at the school she had taught at the year prior but came across this one shortly after and liked the Panda theme better because they had adopted a daughter from China, which is also where Pandas are found exclusively.  Because the Panda bear has such special meaning to her, I thought it would be nice to give her a Panda bear to add to her classroom as a gift.  After checking with my daughter and grandson, I found just the right Panda bear to make her--one that is a little unique and would also identify as being from our family.  This bear is actually a quilted bolster pillow with what is called a broken dish block design on its body (for added interest) but, of course, his paws, ears, eyes and nose have the more traditional Panda (black and white) coloring.  The design is from Stash Happy Patchwork by Cynthia Shaffer.

Here he is at different angles:


Tyler, my grandson, will be giving this to her tomorrow--the last day of school.  I hope she and her new class will enjoy him next school year.  I can just visualize him sitting on top of one of her bookshelves watching over her class.  BUT should she decide to change her theme, she'll always have it to take home to keep and/or give to her daughter.

Okay, back to my to do list.


Have a great week!


Denise


Saturday, May 11, 2013

I List Them

In order to stay on top of the many projects ahead, I list them and check them off as I go--especially when there are so many projects due within a short period of time.  If I didn't know any better, I would believe I was smack dab in the middle of the holidays again.  The only difference is that when I look outside I see that the grass is now green and when I'm in my sewing room the sun comes through a great deal longer.  Thank goodness for natural light; it does wonders for these eyes!

So just off the top of my head, as of today, my sewing/quilting list looks like this:

-  Make gift for grandson's teacher - due next week.

-  Teach applique to Maria (my sewing student) for a graduation gift she's giving to a friend
    - due May 23

-  Guide sewing students on their projects for our booth at the Sprint Campus - due June 19

-  My prep for booth set-up--Project NiniQuilts to be at Sprint Campus - due June 19.  
    That is, make one display plus 12 each of the following summer themed items for sale:

                  13 coin purses
                  13 totes
                  13 picnic mats with cloth napkins
                  13 sun glass cases
                  13 water bottle holders
                  13 headbands - help sewing students
                  13 quilted cuffs - help sewing students
                  13 beer or soda can cozies
                   garments worn by sewing students
                  1 or 2 quilts for display
                  1 bunting with company name & logo


-  Prepare order forms, business cards, and fliers with sewing classes offered

-  Plan, design and make quilt for hubby for Father's Day - due June 16

-  Make 3 pillows for daughter's sofa & modify sheers for bedroom window - no due date

I believe I'll be staying out of trouble at least through mid-June--don't you? What do you do to stay on track when you have a lot going on?  Do you use a calendar, smart-phone, bulletin board, or make post-its along the way?


Wednesday, May 8, 2013

It's Been Awhile

I hope all has been well with everyone!  I haven't posted in awhile as I am sure you've noticed.  My household has been very busy of late and things are starting to settle down a bit - yeah!   Even though I haven't posted, I've still been busy sewing.  Since I last dropped in, I've made window treatments for my daughter's new home and have volunteered at my grandson's school and helped with making pillows for a senior citizen's home.   All while these things were going on, in the back of my mind I knew I had volunteered to participate in another swap at the quilting guild for which I am a member.  The guild didn't specify what we were to make this time, but it couldn't be a pincushion, or a mug rug, or potholders.  Initially I thought about making a wristlet, and I did -


Although it was fun to make and has some nice detail, being zippered and pleated and colorful and all, but it just didn't really seem fitting for a quilter.  So I wracked my brain trying to come up with something . . . but it wasn't until yesterday, after scouring over blogs and websites, that I found something that gave me inspiration.  I happened to have taken a look at Martha Stewart's site and found this:


The above is a very simple sewing machine cover made with a tea towel and some purchased ties.  So I took the idea and ran with it.  I selected fabric from my own stash and measured and wrote down the dimensions of  my sewing machine and began cutting and piecing and sewing.  Here's my version:


My version (cover) is quilted within the pieced border of triangles and rectangles; I made my own ties, and have added beads at the bottom for embellishment.  Even though my gift is simple and understated, I feel so much better about it.  It's colorful and the print fabric I selected does have a sewing motif of buttons and various sewing notions.  The swap is tomorrow - wish me luck.

I'm so happy to post again--it's been too long.  Until next time!


Denise

Sunday, April 7, 2013

We're Gonna Make Real Clothes!

I mentioned in my previous post that I would share my student's reaction after she received my gift.  She was so surprised and excited, and she loved the skirt!  I am also happy to share that after she finishes her current project, which is a carrier for her doll, she'll be making a skirt for herself and other articles of clothing not yet determined.  This is just what I had hoped!  And to every one's delight, she'll not only be learning more techniques, she'll be making some things that are a bit more functional and practical.  I'm sure her Mom will be pleased when she starts seeing some spring and summer garments coming home with her daughter.  Mission accomplished! 

Saturday, April 6, 2013

Denim and Ruffles


Several days ago, a mother of one of my students presented to me her slight dismay concerning her daughter only showing interest in sewing doll clothes.  Her daughter who is 10 and about to approach that in-between stage--you know--the stage that's too old for dolls and too young for boys, is still holding on to those final days of baby doll love.  So to encourage her to venture in other directions, I've decided to make her a skirt and show her the possibilities of what she could make (although they would be simpler designs for now).  So this is my gift to her - a gift of encouragement, incentive, and a diversion all in one!   I don't think I'll have a problem, though, getting her to shift gears once she sees this:
  
Front view - 
 pleated white denim floral skirt with a yellow under-ruffle and a yellow & lavender tie at waist


Back view

 yoke waist and zipper

What do you think?
 
My plan now is that she'll alternate making clothes for her and her doll, or make coordinating outfits as suggested by my friend and guild member, Shea.  Thanks Shea!

I'll let you all know how this goes over in the next couple of days.  She'll see it at class tomorrow afternoon.  Wish me luck.


Happy Saturday!


Denise


Tuesday, April 2, 2013

The "Age" of Creativity

There still seems to be this stigma with home sewing--particularly quilting--that these are crafts for women "of a certain age."  More often than I would care to admit, when the topic of quilting comes up, automatically we think of our grandmothers, or great grandmothers, or a group of ladies in their golden years gathered around fabric with needle and thread in hand.  Yes, this was typical back in the day, and in some instances, still is.  But as with anything else--things change.  Today, machine piecing and machine quilting seems to be the rule rather than the exception and those who are doing it now are grandmothers like me BUT the young and hip, the artists, the urban dwellers, and the young wives and mothers are filtering through, and it's refreshing!   The problem is because of this stigma and a host of other factors, this new "age" of creativity needs a little more momentum.  I am very excited though; I'm excited because I would like to introduce you to Allison over at Fabulous Average Girl http://fabulousaveragegirl.blogspot.com/, a young wife and mother, who enjoys sewing, quilting, and cooking and has a wonderful blog for which she shares her insights and talents.  Today, I've asked Allison to share her thoughts concerning the challenges that goes with her "age" of creativity, and for others like her,   And now, here's Allison -
 
Thank you Denise!  I’m so excited to have a different audience today!  I have been quilting as a hobby since I was 23.  I started longarm quilting in 2010 and have since made it a business instead of a hobby for the last 6 months.  This has really caused me to take a good, hard look at quilting in general.  I find that even at 32 years old I am still one of the ‘younger’ quilters most places I go.  Where are the other 20-somethings?!?  Where has the ‘art’ of just having a hobby in general gone?  (There is a whole post on my blog dedicated to this.) 

Recently, someone asked me why do you seem concerned with just the girls?  Not to be mean to my loving counterpart, but men don’t seem to have any issue with having a hobby. They have cars to fix up, wooden things to build, pictures to take, stuff to weld, etc. You can sign up for a men’s league sport just about anywhere you go.  Women tend to shy away from hobbies these days. Just because you create something from nothing does not make you a home-body, old fashioned, country, retro, etc.  It means you have creativity inside you that you expressed in some medium!  My medium is fabric!  I gravitate towards quilting, but I love making bags, curtains, and all kinds of other things.  My creativity also comes in a hurry too….  So no hand sewing for me! 
 
So how do we get younger people to quilt? I say exposure is the biggest thing. Next time you go to a show, take your daughter, granddaughter, neighbor’s daughter, anyone!  Then let’s get them introduced to the basics.  I love Modern Quilting.  I think that is really going to pull in a younger, urban crowd to this industry.  Embrace it!  Embrace the different styles and techniques they can bring to the table.  The fabric is already out there.  Have you noticed the colors and patterns are brighter lately!?!  There are four quilt shops near my house.  With the variety that has been added they could each carry 20 lines of fabric and never sell the same bolt.
 
Personally I am a traditional quilter who hates to follow patterns. Don’t worry….  That makes no sense to me either!  I am just beginning to really embrace the modern quilt movement too.  It doesn’t mean I’ve stopped making the quilts I’ve always known and loved.  I recently made my first art style ‘landscape’ quilt.  Very cool challenge! 
 
There’s another post on my blog about the right way and wrong way of doing things.  Let’s make sure we don’t shut out the next generation by making rules for what should be an enjoyable hobby.  Nobody wants rules on their off day! 
 
My other non-favorite classification is ‘fabric snob’.  Meaning you only purchase the highest quality quilt shop fabrics.  While I fully support local quilt shops and just drool over their fabric, it doesn’t mean it’s the only option.  I’d rather see someone make a quilt with $2 a yard fabric from a chain store, than to not make a quilt at all. 
 
My next challenge is to get into Career Day at the local high schools next year!  It might not be someone’s next career, but their life and career may be more enjoyable if they have a hobby like quilting.

Allison, thank you so much for sharing your perspective on changing the mindsets of young women and others as it relates to quilting, and hobbies in general.  Also thank you for suggesting that we encourage  young girls by exposing them to this art form.   As simple as it sounds, it doesn't happen often enough!  I am delighted you came by and am excited to see new and exciting things by way of your blog.  I hope you will come again soon, because as a young female entrepreneur, I believe you are inspiring those who read this today and those who will read this for days to come.  At the very least, we can hope that you are adding a little more push to the momentum.

Friends, followers, and first-time readers, thank you for stopping by.  Before I leave, however, I would like to share one more thing:  Another way to encourage quilting (or any creative hobby) for young women is to direct them to Allison's blog at http://fabulousaveragegirl.blogspot.com and others like her.  Search and you shall find!
  

Denise 

Wednesday, March 20, 2013

Monkeys, Masks, & Bags - Oh My!

Have you ever grown so accustomed to a storage holder that when it's time to replace it (for whatever reason) and you haven't had time to, you start feeling like pulling your hair out?  Tragic I know!  I've just experienced this "small" annoyance, and, unfortunately, it was all about a silly little grocery bag holder that I keep in my kitchen!  In fact, I had used my holder so much that the elastic openings were worn out at both ends and would no longer hold the bags.  Consequently the bags would end up on the floor.  And, silly as it may sound, I have developed this habit of keeping the plastic bags you get from the grocery store because I use them for various purposes around the house.  For example, I use them to line the small trash container under my kitchen sink; I use them for fruit rinds that I don't put through the garbage disposal; and I use them to wrap (cushion) cans and jars before placing them in the trash.  The list goes on and on.  Anyway to make matters worse, I don't want just ANY type of holder; it has to coordinate with my kitchen decor.  I know--how girlie or picky am I?  I've come to the realization-- PRETTY girlie and PRETTY picky!

A few years back, I was fortunate to have spotted one that happened to go with my decor.  My kitchen has an African Island theme so some items are easy to find and some are not so easy.  Well I figured my chances of finding something similar this time around would be a little slim--and certainly wasn't worth the store-to-store hunt--after all it's a holder for recycling grocery bags!  So you probably know what's next?  Yes, I decided to make one. 

Yesterday morning I took a look around the kitchen and thought:  no--no palm trees.  Besides, that was the motif on my old holder and I have a few trees in my kitchen already, such as the print on the wall.


Then I decided:  no--no monkeys.  I already have a few scattered here and there.


Then I thought-- how about a mask?  As of now, I only have one and it's hiding just above the frig, along with some earthenware.


So I made the decision and here's my holder!


Quite tribal looking wouldn't you say?  To maintain the shape of the mask even when I have a low supply of bags, I inserted an empty oatmeal container in which I had taken off the lid and cut off the bottom.  So now I am back to collecting bags for everyday use!  Hooray!


Monday, March 11, 2013

Mug Rug Swap

I signed up to participate in a Mug Rug Swap through quiltinggallery.com back in January.  Each participant was a assigned a partner to swap two mug rugs based on a design provided by the facilitator.  The deadline for mailing mug rugs to assigned partners is this month, mid-March.  I mailed out my mug rugs on Saturday, so I'm a little ahead of schedule-yeah!   The mug rugs have a bird theme and were designed by Amanda Weatherill from The Patchsmith.  (Check out her blog:  thepatchsmith.blogspot.com for ideas and tutorials).  Anyway, here is what my partner will receive in the mail in the next few days.

The first entitled:  Two Owls 


 The second entitled:  Winter Birdhouse


While these were fun to make, I probably wouldn't have chosen these designs for myself.  I love nature and birds, particularly owls, but am more inclined to make things geared toward interior aesthetics, such as coffee pots and cups, teapots--that sort of thing.  I chose to participate, however, because I wanted to stretch beyond what I would normally do and connect with more quilters.  I do believe I've accomplished that, and I've now made another friend to share quilting and sewing ideas.  

If you've ever contemplated participating in a Swap - be it mug rugs, mini quilts, pincushions or whatever- yet haven't actually done so, it is a great way to connect with others while learning new skills or keeping your skills in tact.  Give it a try!

Have you participated in a Swap?  If so, what kind?  What was your experience?  Did you enjoy it or not and why? 

Now on to my next project.  I'll be back soon.

Wednesday, March 6, 2013

Pasta Bibs - Take 2!

As some of you know, a couple months ago, I made pasta bibs for a spaghetti dinner I hosted for Bunko Night at my house.  I received such positive reactions that I thought I would provide a tutorial.  By the way, my Bunko group is having our monthly get-together at another member's house tonight and I want to mention that from time to time we also do other social activities together as well as contribute to charities.  Tonight, in addition to playing Bunko, all of the members are bringing items for gift baskets we're making for an upcoming Parkinson's Foundation Fundraiser.  One of the baskets we're making is a Pasta Basket.  My contribution will be two pasta bibs and a few other items, so I'm also taking advantage of the time put into making these by sharing with you how I made them.  These bibs are a little more refined than the initial set of 12 I made.  My initial set was nice but due to time constraints, I didn't add the touches I would have liked, and another factor is I only had to make two of them this time.

Here is a picture of my latest version:


Now for the Tutorial!  Note:  Instructions are for making one bib - so duplicate actions when making two.  Fabric amounts listed below are for at least two bibs--dining for two that is.   Consider additional fabrics and supplies when making more.  

Supplies Needed:

- Large Cutting Mat

- Rotary Cutter - 45 mm

- small scissors

- seam ripper (just in case)

- 6" x 24" ruler

- Round the Corner Template by June Tailor or round dessert plate

- Fabric 1 - Bottom panel - 1 1/2 yds. of 44"/45" 100% cotton fabric - your color choice (I used gold  background Italian themed novelty print.)

- Fabric 2 - Top panel - 2/3 yd. 44"/45" 100% cotton fabric - your color choice (I used abstract plaid -   matching colors to bottom panel)

- 1 1/2 yds. Cotton lanyard - white or color of your choice

- 1 Sew-In Color Fast Fabric Sheet for InkJet Printers (I used June Tailor Brand - 8 1/2" x 11") 100% cotton and washable

- Image or graphic selected from your computer to go with pasta theme.  See example:


- Sewing machine (and serger if available but not necessary)

- iron and ironing board

- fabric safe marking pen


- See sewing supplies:


Instructions - (Note: sew fabric pieces using 3/8" seam allowance)

1) Using a cutting mat and a rotary cutter - cut the following fabric pieces:

 - 18 3/4" x width of fabric (44"/45" wide) for bottom panel-Fabric 1
 -   7 3/4" x width of fabric (44"/45" wide) for top panel-Fabric 2
 -   2" x width of fabric (44"/45" wide) strip for facing at top panel-Fabric 2
 -   1 1/2" yds. lanyard cut in half - (reserve other piece for a second bib)

2)  Take bottom panel and fold right sides together length-wise meeting raw edges.  Place Round the Corner Template (large side) or dessert plate at one end at raw edges and mark round edge.  Rotary cut around template or use scissors and follow marking if using plate to round edge.

3)  Open bottom panel and place top panel fabric and bottom panel fabric right sides together - sew together at opposite side of curved bottom panel.  Then either serge (using three threads), zigzag, or overcast seam to finish.

4)   At raw edge of top panel place markings approximately 5 to 6 1/2" in from both sides at top and place lanyard (which is now 18") in horseshoe fashion (curve toward you) and raw edges meeting top raw edge of  fabric -with each end at markings and secure.  Then place the 2" facing piece wrong side up on top.  (Layers should be:  top panel facing up, lanyard next, then facing wrong side up - all pinned and ready for stitching.  Now take layers over to the sewing machine and stitch all layers together.  Note:  back stitch 1 or 2 times over sections where lanyard was placed and continue stitching entire seam straight across - no need to back stitch at either end of seam at this point.

5)  Turn facing over to back of top panel and press.  Next top stitch front panel and facing (which is now behind front panel) in place.  Lanyard should be free and dangling.  Pick up bib by lanyard and determine its center position and cut with scissors at center point.  Knot both ends of lanyard - you now have ties for the bib.

6)  Print computer image onto Sew-In Fabric Sheet according to manufacturer's directions.  Fold bib in half  lengthwise and finger press to determine center position.  Cut label to 3" to 4" square or size appropriate   for image you've selected and place image label on top panel at center, center position and machine applique or hand applique in place.  (I did machine applique.)

7)  Now you're at the final stretch!   Three-thread serge or overcast stitch around the sides and bottom of entire bib.  Dot Fray Check at beginning and end of serged/overcast stitching.  (Final stitching around the perimeter will reinforce all previous stitching where no back stitching was required.)


Your bib(s) is/are ready to use during a wonderful pasta dinner!  Enjoy!!!


This bib is simple to make so don't let the length of the instructions make you think twice about making it.  I just wanted to be as clear and as detailed as possible.  Any feedback or comments regarding this tutorial are welcome.  Please post whether you choose to make the bib or not--I'd love to hear from you.